3 |
Controller Setup |
 |
How to hold the controllers depends on whether you are using the Wii Remote by itself or in combination with other accessories.
Note: For information about how to attach the wrist strap and how to connect the various accessories, refer to the Wii Operations Manual – System Setup or the instruction manuals for each controller. 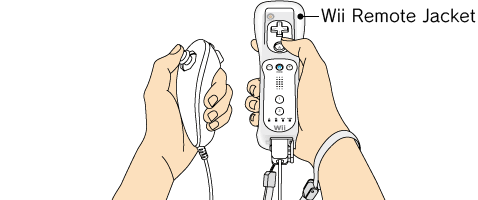
When using the Nunchuk 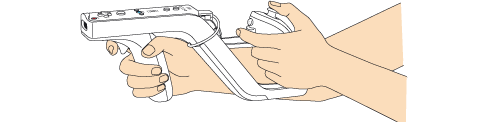
Using the Wii Zapper – Nunchuk Attached
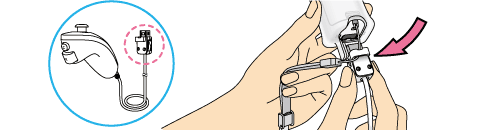
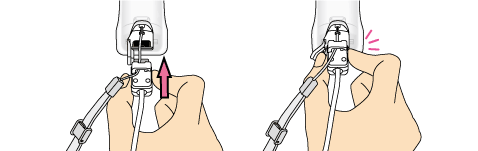
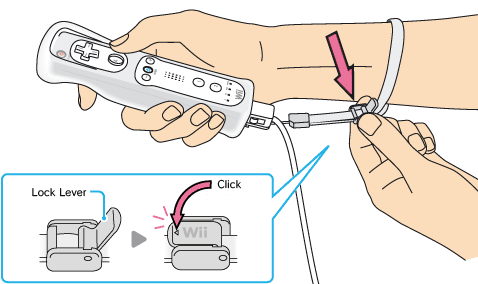
Note: If your strap lock has a lock lever, press the lock lever down until you hear a click. This will prevent the strap lock from loosening.
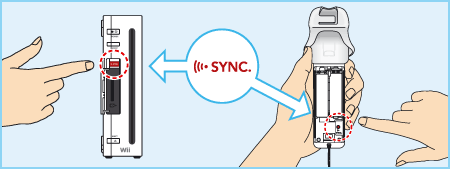
This procedure allows the Wii Remote to communicate with the Wii console. There are two different modes of synchronising (synching) a Wii Remote with your Wii console. Standard Mode – The Standard Mode procedure is used when adding additional Wii Remotes to your Wii console or if you want to re-synchronise your original Wii Remote. Once synchronised, the Wii Remote will stay synched to the Wii console unless you overwrite this setting by synching the Wii Remote to a different Wii console. One Time Mode – This mode allows you to temporarily use your Wii Remote on a Wii console other than your own or to use a friend’s Wii Remote on your Wii console. It does not delete the Standard Mode setting stored in the Wii Remote. In this mode, the Wii Remote will only communicate with the Wii console while the power is on. When the power is turned off, the Wii Remote will lose its synch with the Wii console. Note: Only a Wii Remote in Standard Mode can turn the Wii console power on or off. Standard Mode Synchronisation Note: Make sure you have placed batteries in the Wii Remote.
 This procedure must be followed for each additional Wii Remote added to your Wii console.
One Time Mode Synchronisation Note: This mode temporarily removes Standard Mode synchronisation setup for all Wii Remotes until the power of the Wii console is turned off. When the power is turned back on again, the Standard Mode settings will return.
IMPORTANT: If your Wii Remote loses its synchronisation with the Wii console and you are unable to re-synch it, review “6. Synchronising your Wii Remote with the Wii console” in the Wii Operations Manual – System Setup.
If the Control Stick on the Nunchuk is moved out of neutral position (see below) when the power is turned on, or when connecting to the Wii Remote, that position will be set as neutral position, causing incorrect game control during game play. To reset neutral position, do the following:
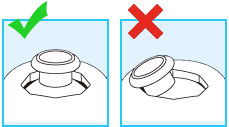
Neutral position for the Nunchuk The neutral position is where no control sticks are tilted and no buttons are being pressed. |
 on a Wii Remote that is synchronised with the Wii console.
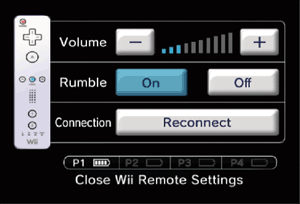
 and
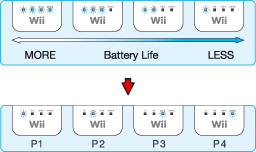
and  simultaneously on the Wii Remote that you want to synchronise with the Wii console. The order in which you synchronise Wii Remotes will set the player order for multiplayer games.
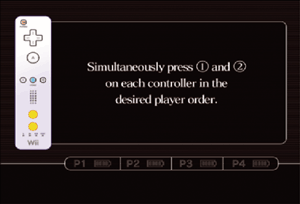
 ,
,  ,
,  and
and  on the Wii Remote for approximately three seconds.
 |
 |
 |